tweet tweet

Standard

IMG_1187

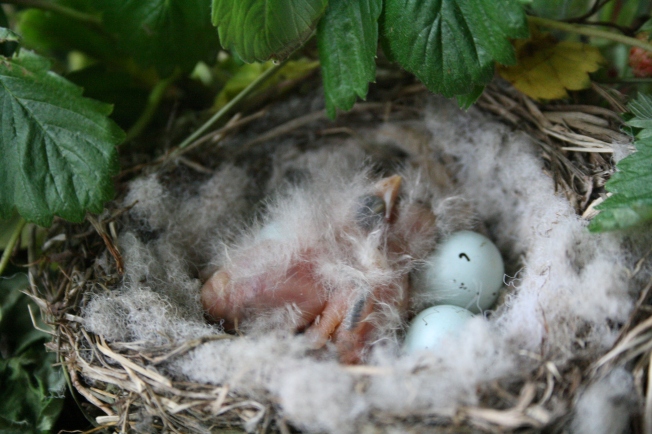
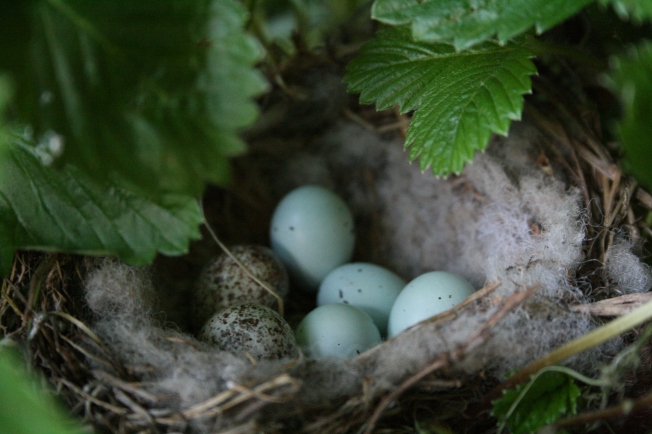
Spoiler alert: this post has nothing to do with twitter. Something magical occurred in my hanging plant this spring. Shut up, I know there are birds everywhere making baby birds every spring, but this shit went down on my front porch. It’s like a nature reserve in your front yard.

I was totally smitten with these darling eggs, which were eventually replaced by the below not-so-darling baby birds. I thought baby insert-any-animal-name-here were supposed to be cute. When do they get cute?

IMG_1190

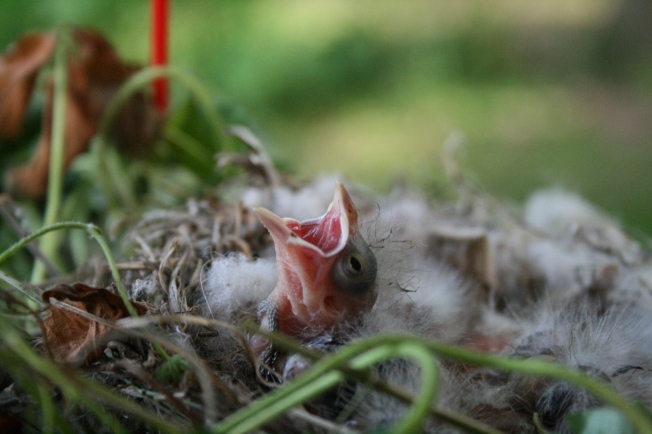
Alright, they’re sort of cute when they’re hungry, but I still think they looked like feathery aliens at this point. Mama bird, you’re slackin’, we need some ABC (that’s already been chewed for anyone who doesn’t remember elementary school recess conversations as well as I do) worms over here, stat!

IMG_1193

Once they got a little bigger and acquired some real feathers they started to look less like aliens, though they got considerably noisier (not to mnetion smellier). At this point my short ass dogs became really pissed off that they couldn’t reach to eat them.

IMG_1198

Downsides to baby birds in your hanging plant, besides the late stage smelliness? Apparently mama bird is a total asshole, because I discovered the fuzz she used when building the nest is from my outdoor chair cushions. See Exhibit A below. Thanks for that, mama bird. You couldn’t have used some more sticks and shit instead?

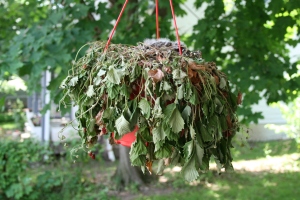
It was also rather difficult to, you know, deliver life-sustaining water to said hanging planter while trying not to soak the nest. See Exhibit B below. Perhaps this was partially my fault seeing as I did forget to water the plant entirely for a solid 4 days. Oops.

IMG_1203     IMG_1202

The babies flew the coop the other day, never to be seen again (tear-they grow up so fast!) and they were totally worth the eventual and inevitable demise of my plant. (We all know I was going to forget to water it anyway).

Any backyard nature-ness going on in anyone else’s yard?

Cheers,

Christine

psst! I took all these photos using full-on manual mode on my camera. Bam! Making some progress with my photography skills.

Dr. Suess canvas tote

Image

Dr. Suess library tote

I made this cute library book tote for my future step-nephew, Ethan. I was inspired by this version on Ucreate (one of my favorite crafting blogs) but I decided to make mine more topsy turvy-it seemed more Suessian like that. I also accented the crazy topsy turvy by stitching the felt with a zig zag pattern. The entire project cost about $3! I used a Hobby Lobby coupon to purchase the canvas tote.

Dr. Suess bag closeup

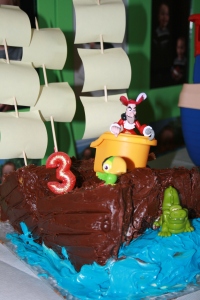
Do you ever watch Cake Boss? Making the basic design for this bag I felt sort of like I imagine those bakers must feel when they make one of those crazy ass cakes. Except for the fact that there was no possible way 10 layers of baked goods could flop over on me. Winning. Especially considering the Pirate Cake Disaster of 2012-ship wrecked pirate cake anyone? (My sister doesn’t want to talk about it.) Though I will proudly tell you that the blue “wave” to the forward of the watercraft is none other than a roll, added purely for structural reasons. This was a split level pirate cake, if you will. But I digress.

pirate ship cake

Materials:

  • Canvas tote
  • One sheet each red and white felt
  • Sewing machine and white thread (or thread and needle if hand stitching)
  • Fabric marker
  • luggage tag (to act as library card holder, optional)

Instructions:

Print out the Dr. Suess hat template.

Cut out the topsy turvy felt pieces from felt and pin in place on your tote. Leave space for your quote if desired. Sew felt in place by hand or using a sewing machine. If you’re using a machine, a zig zag stitch lends a whimsical feel.

Pencil your Suess quote on the tote. The Ucreate tutorial I linked to above has a link to a neat Suessian font, but my handwriting sucks, so I decided to go basic on this. Go over your quote with a fabric marker and done!

I chose to make a library card holder out of scrap fabric, but it was really a pain, so if you want to add a card holder, I’d recommend using a spare luggage tag of some sort. (I did successfully sew a button/buttonhole in the process which seemed like a big deal for a beginning sewer like me-woo!)

library card holder 

So that’s it! I hope you enjoy crafting a tote of your own.

Cheers,

Christine

Upcycle Christmas cards into next year’s gift tags

Standard

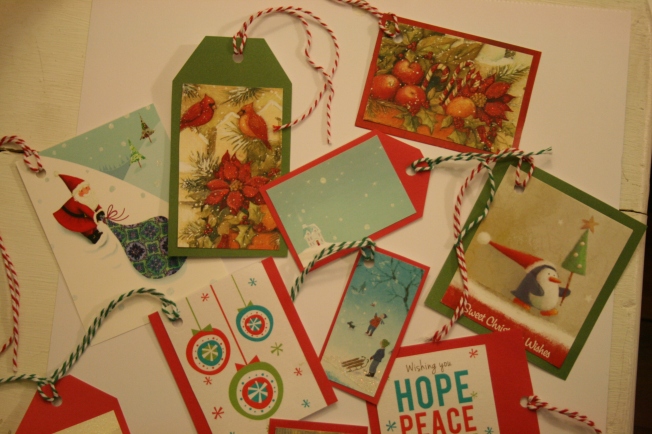
upcycle Christmas cards into gift tags

Wait! Don’t recycle those Christmas cards just yet! You can upcycle them into gift tags to use next year.

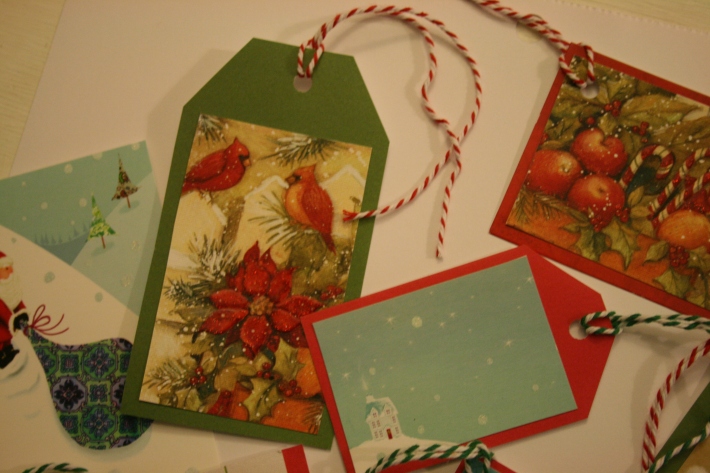
All you need to do is cut out cute sections of the cards, back with scrapbook paper or card stock, punch a hole and you’re done!

I made some of mine shaped like old school packaging tags by cutting the scrapbook paper backing a little longer and snipping off the corners.

Image

Easy peasy and a mini head start on next year’s gift wrapping!

I got the bakers’ twine from www.pickyourplum.com – they have a new deal on something crafty every day-check ’em out!

Cheers,

Christine

You might also like: https://allingoodspirits.wordpress.com/2012/10/08/perfectly-packaged-hostess-gift/

Cheers to 2013

Image

Cheers to 2013

Is it mid-January already? Oh well, belatedly, here’s to a joyful and peaceful 2013!

I’m not into resolutions, but I just read The Happiness Project by Gretchen Rubin, and it really made me think about the little changes I can make in my daily life to be happier (even though I’m already pretty happy). Worht a read if you are (or aren’t) into new year’s resolutions.

Cheers,
Christine

Photo above taken just West of Gettysburg, Pennsylvania on Christmas Day 2012

You might also like: You should read these

Apple Cider Caramels

Standard

IMG_0677

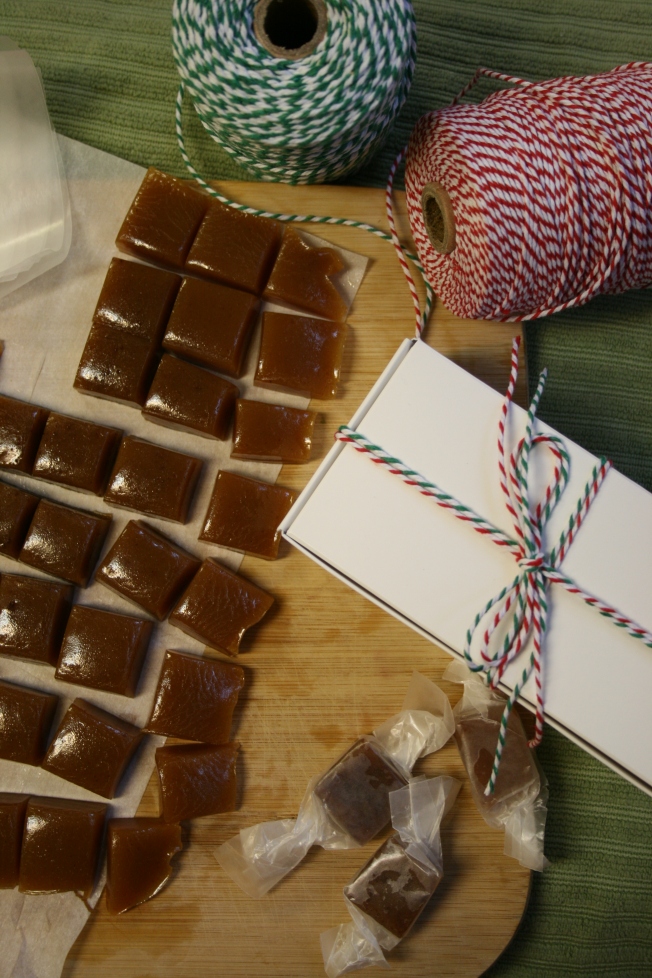
Have you picked up the Smitten Kitchen Cookbook? Ok, go order it right now. You’ll even have it in time for Christmas! Or maybe even early enough to make a couple of batches of these lovely apple cider caramels for gifting. That is, if you can manage not to eat them all yourself. One batch of caramels, individually wrapped in wax paper, perfectly filled three small gift boxes which I tied with bakers’ twine in festive colors.

IMG_0705

You can find the full recipe here. It needs no improvement, though I will note that I accidentally used 1/3 cup less white sugar than the recipe called for, but it seemed to work out just fine. I guess my supervisor wasn’t paying very close attention, was he?

IMG_0674

Happy caramel making!

Cheers,

Christine

Homemade Granola

Standard

IMG_0623

I have a bit of an obsession with greek yogurt. It’s thick, it’s creamy, it’s full of protein, and it’s awesome with fresh fruit or applesauce and some homemade granola. Specifically, this homemade granola.

You’re probably thinking to yourself-why would you make granola when you can just buy a box of it at the grocery store? Well, friend, store bought granola is expensive and much less tasty. This recipe has a hands on time of about 5 minutes and the final result has the best flavor and texture-perfectly nutty and crunchy. You may never buy granola again.

Homemade Granola

Ingredients

  • 4 C old-fashioned rolled oats (not quick cooking)
  • 1 C sliced almonds
  • 1/2 C shredded coconut (preferably unsweetened)
  • 1/4 C unsalted pepitas (hulled pumpkin seeds) and/or shelled sunflower seeds (I like to use 1/4 cup of both)
  • 1/2 C pure maple syrup
  • 2 T canola oil
  • 1 t vanilla
  • 1 t almond extract
  • 1/2 t kosher salt
  • 1 C dried fruit (such as cherries, cranberries, raisins, or currants)-optional

Heat oven to 350. On a rimmed baking sheet, toss the oats, almonds, coconut, and pepitas with the maple syrup, oil, vanilla, almond extract, and salt.

Bake, tossing once, until golden and crisp, 25 to 30 minutes. Add the dried fruit if using and toss to combine. Let cool. Keep at room temperature in an airtight container for up to 1 month. Makes 6 cups

Recipe adapted from Real Simple.

Side note: I once was out of maple syrup, so I substituted honey. Don’t try this unless you like your granola charred and your kitchen filled with smoke .

IMG_0622

Cheers,

Christine

Hazelnut cupcakes with mousse filling

Standard

This is probably the most ambitious thing I’ve baked in a while. We won’t talk about the semi-disastrous pirate ship “shipwrecked” cake for my sister’s fiancé’s son’s 3rd birthday. (Hint: it wasn’t supposed to look shipwrecked.)

The recipe is adapted ever so slightly from Vegan Cupcakes take over the World, quite a good cupcake cookbook even if you’re not vegan, which I am not. So my cupcakes were sort of vegan because I had only regular milk on hand though the recipe intends for soy or nut milk to be used in actuality. It tastes just as good either way. Your friends will never guess the secret ingredient in the mousse, just as my unsuspecting coworkers didn’t. Legit deliciousness.

The cupcakes are meant to be filled with the mousse and topped with ganache, but I was running short on chocolate chips and the mousse recipe makes a lot, so I decided to fill AND top the cupcakes with the mousse. I have included the ganache recipe below if you’d like to go that route.

A note on toasting hazelnuts: it’s easiest to toast them in a skillet on the stovetop, just be sure to be vigilant, because they can burn in a second. Once they’re nice and golden brown, let them cool off for a minute then pour them onto a clean kitchen towel. Fold the towel over top and rub them until the skins come off. Obviously, you can skip this step if your nuts came without the papery peel on the outside.
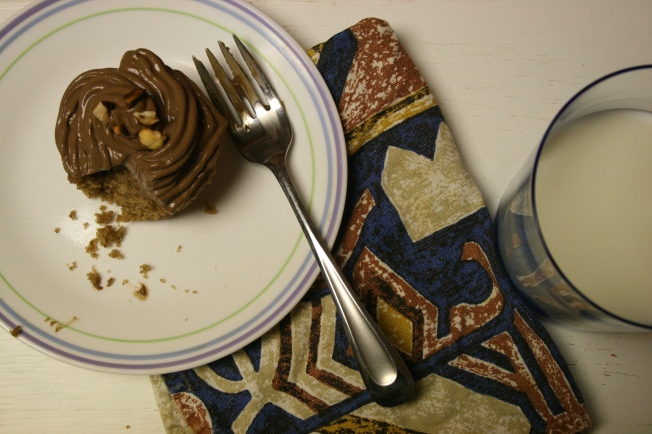
Directions: Prepare hazelnut mousse first so it can chill. Make the cupcakes. Once they are completely cool, prepare the ganache.

Hazelnut cupcakes with mocha hazelnut mousse filling

Ingredients:

  • 1 C plus 2 T all-purpose flour
  • 1/3 C hazelnut meal or flour (I just ground up toasted hazelnuts in my coffee/spice grinder)
  • 1 t baking powder
  • ¼ t baking soda
  • ½ t ground cinnamon
  • ¼ t ground nutmeg
  • ½ t salt
  • 2/3 C rice, nut or regular milk
  • 1 T ground flaxseeds
  • 1/3 C canola oil
  • ¼ C pure maple syrup
  • ½ C brown sugar
  • 1 t vanilla extract
  • 1 T hazelnut liqueur or 1 ½ t hazelnut extract
  • 1 C chopped toasted hazelnuts for garnish OR chocolate covered coffee beans
  • 1 recipe chocolate ganache (see below), prepare when cupcakes are fully prepared (optional)

To make the cupcakes:

Line cupcake pan and preheat oven to 350. In a small bowl which milk and ground flaxseed. In a large bowl sift together flour, hazelnut meal, baking powder, baking soda, cinnamon, nutmeg and salt.

Add the maple syrup, brown sugar, canola oil, vanilla, and hazelnut liqueur to milk mixture and beat well. Add wet ingredients to dry, mixing until mostly smooth. Pour into liners, filling them 2/3 full. Bake 22 to 24 minutes until toothpick inserted in the center of one comes out clean. Cool completely on racks before filling.

Fit a pastry bag with a wide piping tip and fill with mocha hazelnut mousse filling (see recipe below). If using ganache, have prepared.

Poke or scoop holes in the top of each cupcake. A small spoon works for this. Fill with as much mousse as you can.

If using ganache, remove excess mousse from top of cupcake. Spread ganache on top. Two layers of a heaping teaspoon each time makes a smooth surface. Sprinkle with chopped hazelnuts.

If not using ganache, pipe mousse on top of cupcake like you would frosting.


Mocha hazelnut mousse filling

Ingredients

  • 6 oz extra firm silken tofu (half a package of the aseptic kind, such as mori-nu)
  • 2 T milk or soy milk
  • 1 T agave nectar or pure maple syrup
  • 4 t instant espresso powder (I used instant coffee since that’s what I had on hand)
  • 2 t hazelnut liqueur
  • 1 t vanilla extract
  • 6 oz semisweet chocolate, chopped, or 2/3 C semisweet chocolate chips

Crumble the tofu into a blender. Add the milk, agave nectar or maple syrup, espresso powder, hazelnut liqueur, and vanilla. Puree until completely smooth and set aside.

Melt chocolate in a double boiler. Once melted remove from heat and let cool for 5 minutes stirring occasionally.

Add chocolate to the tofu and blend until combined using a spatula to scrap down the sides of the blender

Transfer mousse to an airtight container or bowl covered in plastic wrap and let chill for an hour. Remove 10 minutes before using. Stir with a fork if too firm to work with.


Chocolate ganache

Ingredients

  • ¼ C milk, rice milk, or nut milk
  • 4 oz semi-sweet chocolate, chopped, or 4oz semisweet chocolate chips
  • 2 T pure maple syrup

Bring milk to a simmer in a small saucepan. Remove from heat and add chocolate and maple syrup. Stir to combine.


This recipe puts me one step closer to my goal of making everything on The List of Stuff I Want to Cook actually two, if you count the mousse, which I think I just will.

  • ·         Can something
  • Make a soufflé
  • Poach something in olive oil
  • Bake fish wrapped in parchment
  • Make crepes
  • Make homemade vegetable stock
  • Make a cupcake with a filling
  • Make panna cotta
  • Cook something Indian
  • Make risotto with saffron
  • Bake focaccia
  • Make ice cream with vanilla beans
  • Make mousse
  • Make homemade ravioli
  • Bake French macarons

Anyone doing any baking or working on any cooking challenges out there?

Cheers,

Christine

You might also like: coconut macaroons
Fall Snapshots

Standard

Apple harvesting time came a little early this year in Adams County, Pennsylvania, but that could never deter the Apple Harvest Festival, held annually the first two full weekends in October. I volunteer at the candy and caramel apple stand every year as a fundraiser for my softball team. It was a cold one this year; 29 degrees when I arrived at 8am and we would gather around the kettles to keep warm in between wrapping up batches of apples to sell. Candy apples are a little messy and hard to eat for my taste, but man, are those caramel ones to die for.


National Geographic named the Apple Harvest Festival on it’s Top 10 Fall Trips for 2012. Save the date for next year’s festival; it’s not to be missed! October 5 & 6 and October 12 & 13, 2013.

Cheers,

Christine


Harvest before the first frost & fall garden goings on

Standard

If you’re a gardener, you may know the feeling. You check the weather and realize-eek! All my plants are going to die tonight! (At least this is what usually happens to me.) So it never fails- I’ll be found digging up herb plants and picking green tomatoes and peppers in sub forty degree weather, in the dark.

If you’re wondering what the purple peppers are, those (and the yellow, orange, red ones) are a spicy Chinese 5 Color Pepper. When growing, the plant looks like it’s covered with Christmas bulbs, it’s pretty comical. I bought these and my other heirloom seeds from Baker Creek Heirloom Seeds.

Not one to break tradition, that’s exactly what happened this year…I gathered up all the green tomatoes and peppers and brought in the herb plants (which were in pots this year) just in the nick of time.

Other fall garden goings on: I purchased and planted a 1/2 pound of Extra Select Garlic (from Burpee). This is the first time I’ve done garlic. Garlic is planted in the fall and harvested about July or so. You separate the cloves, plant them individually, and each clove makes it’s own bulb. The bigger the clove, the larger the bulb it will make. I was pleased when about 2 weeks after I sowed the garlic there are shoots!

I also planted a few bulbs and perennials out front in my embarrassingly barren front yard. The Russian Sage and Salvia I bought were 75% off at Lowe’s, so I’m just taking a chance they’ll make it though the winter. I mulched them with some leaves for protection. They aren’t much to look at now so I’ll spare you the before photo until there’s an after. Wes planted some beautiful orange and white mums out front also and I’m hoping they’re hardy enough to come back next year. This article about over wintering mums suggests to leave the foliage on fall planted mums and mulch them for protection. Easy enough-we’ve still got plenty of leaves!

Any tips for overwintering newly planted perennials that have worked for you?

Cheers,

Christine

Perfectly Packaged: hostess gift

Standard

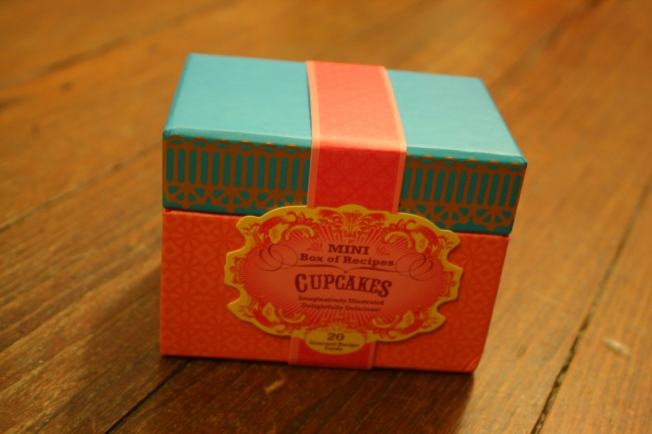
I was visiting my BFF Kathleen at her new apartment in Baltimore for dinner and an overnight stay and I wanted to bring her a little something. I stopped in at Lark in Downtown Gettysburg and found the most adorable mini box of cupcake recipes. (p.s. love this store-I want to decorate my entire house with the accessories they carry-I might need to do a little window shopping post there sometime like Sherry does on Young House Love).

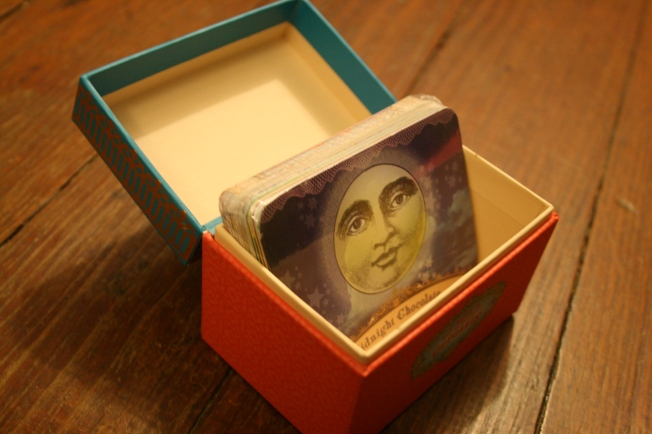
Each cupcake recipe card is beautifully illustrated and unfolds to reveal the ingredients and instructions.

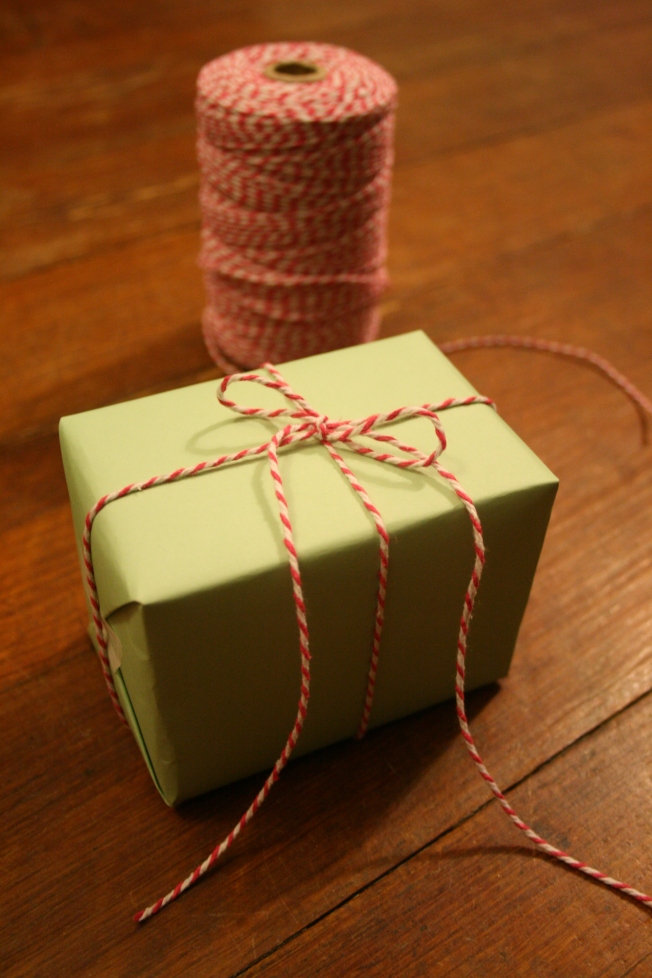
I just wrapped this bad boy up simply in mint green scrapbook paper and tied with a pink baker’s twine bow. I bought the baker’s twine on Pick Your Plum-they seem to bring it back in their daily sale every now again, so sign up for their email if you’re interested in deals on craft stuff.

Done and done. Nothing better than a pretty gift, prettily wrapped for a lovely hostess.

Cheers,

Christine